Althrough I try to avoid editing photos in photoshop, only developing RAWS in Adobe Lightroom, i can't deny that in some fields of photography hard photoshop editing is necessery. I try not to judge if it's good or bad, i an just aware in what world we live, and how do models look like in magazines covers, billboards, any advertisements and so on.
There is so many technics of retouching photos as many photographers/graphics are. I'll try to show you a couple of tricks i managed to discover. Just remember, the most important is being conscious and thinking of what you do - just to avois such funny situations like here: Photoshop Disasters :)
We are beggining with a photo. Not every photo is equally good. In this method of retouch we tahe care of skin, so it's obvious that the model have to show some skin. Equally important is lighting. Front light from big softbox, or from photographic umbrellas work best for me. Probably flashring would be good as well, but i haven't try it so far. In natural light, we wil have the same resultats setting the model in front of window but at some distance, and we take position just in front of the window, so that we see the model from the window point of view. The photo itself should be a little bit underexposed. At all cost avoid overexposure - you can't really remove it even when you develop RAW in lightroom.
This tutorial is writtne in easiest possible way, but still i suppose you know basics of photoshop. All operations are made in Adobe Photoshop CS3, but avoiding all the new features and tools, newer than PS 7.0, so the tutorial is compatibile with all versions from 7.0 to CS3 and probably even with older ones.
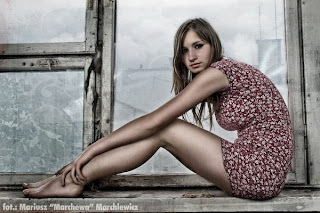
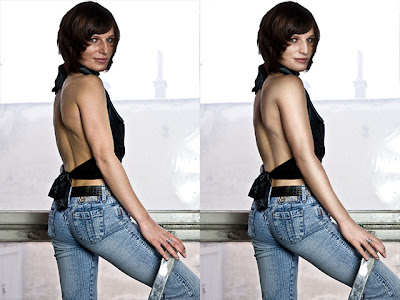
Let's start. I'll show you how to get perfect, almost plastic ;) skin, just like on the pic below.
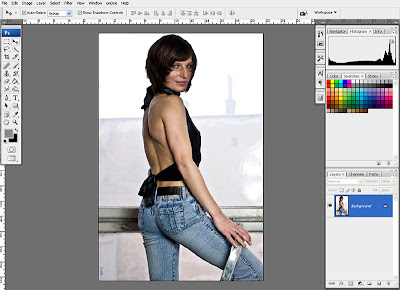
The whole trick is to make two or more layers, first lighting up, second darkening the skin. We are starting with freshly developed RAW file:
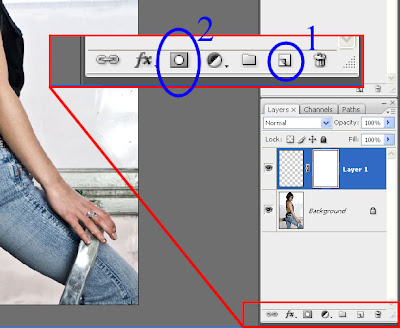
Create new layer (1) and add a layer mask (2):
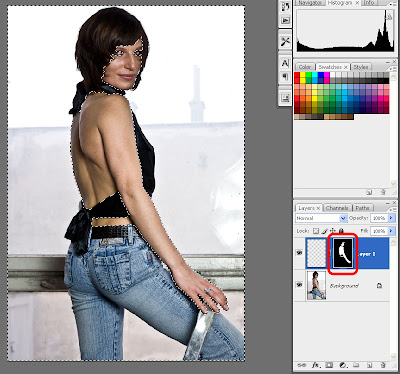
Using selection tools select everything except for the skin. Then select layer mask, by clicking it's thumbnail in layers palette, fill selection with black color using pain bucket tool. After the operation thumbnail should look like on the pic below. Then deselect selection Ctrl+D
Duplicate the layer by Ctrl+J Rename layers, let's say to "lights" and "shades" - remembering that one will brighten up the skin, and second darkening it.
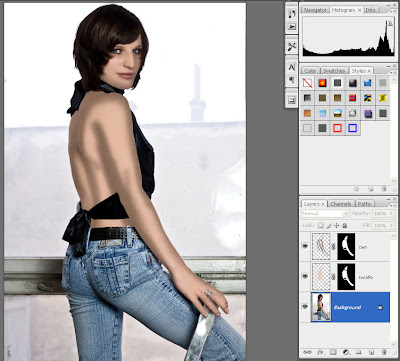
First brightening. Using Eyedropper tool select colour from bright part of the skin - here i chosed from the middle of the arm. Now select Brush tool. Set hardness to 0% so that the brush have most soft edges. Set Opacity and Flow of the brush both to about 50%. Then use the brush to paint those parts of the skin that are already bright. Don't worry about painting out of the skin - layer mask hides everything that is not over the skin. Just remember to paint on the layer, NOT ON THE LAYER MASK - to make sure, before painting, click on layer thumbnail in the layers palette (it's the left one, the right one - B&W - is a layer MASK). When you finish painting lights, you can start painting shades on the other layer - use the same procedure, but using Eyedropper tool choose color from shaded part of the skin. Don't be scared by the result when you finish both layers :) it looks weird, just like on the pic below, but it's not the end.
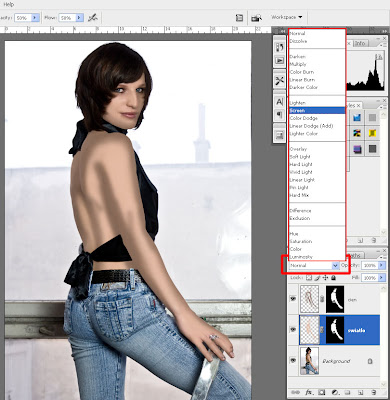
Now part that don't have to look exactly the same in your work. We have to set Blending Modes to both layers, what makes all the trick. Select layer that brightens up the skin. In LAyer Palette click Blending Mode menu (default set to Normal), and select Screen Mode.
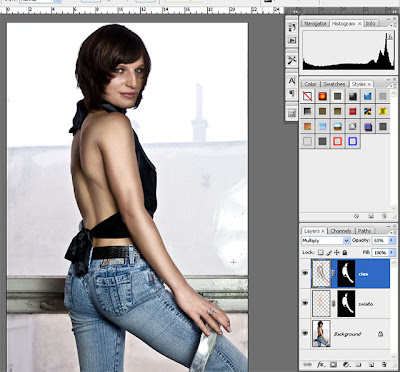
On the layer responsible for darkening the skin, set the Blending Mode to Multiply. Now change Opacity of both layers - slider and number field is on the right from Blending Mode field. In my case opacity 50% for lights layer, and 60% for shades layer looked best, but in your case different values can fit better. Just try and experiment. You can also experiment withe different Blending Modes, for example, instead of Multiply, you can check Ovarlay Mode. Pay attention to layer order - changing layer order in Layers Palette will change the final result. You can also use more than two layers. No rules, just experiments :) And below the final result of the tutorial.
Thats all. If you have any questions, feel free to ask. I'm also waiting for propositions of next tutorials.

1 comments:
fajne przydalo sie, dzieki
Prześlij komentarz